Let’s Party (Moana style)!

photo-4917949921099776As a mom of 2 girls whose birthdays are within 5 days of each other I am fully committed to throwing only 1 birthday party for the both of them. We’ll see how long they let me get away with that! Last birthday theme was unanimous: Moana! Thankfully, it’s pretty easy to locate and create ‘luau’ styled decorations so it was really up to me how far I was willing to take it…which was pretty far! I don’t know who gets more excited about putting together a party, them or me!

I ended up watching countless hours of YouTube videos on building your own balloon towers and decorating cakes with fondant, and I’m pretty proud of the final results! I was able to keep costs down by using our condo’s party room, buying balloons online in bulk, shopping at the dollar store, baking my own cake and by making almost everything myself. I’m pretty proud of how everything turned out! That cake was quite a feat and if I hadn’t had the assistance of a dear friend who actually used to train pastry chefs I’m not sure how it would have turned out. (Thanks Christina for the fondant expertise!)

This slideshow requires JavaScript.

Check out my Pinterest board and see where I got my inspiration! Moana Pool Party

The “Kakamora Cake Pops” were quite a hit! I made the cake pops by using a box cake mix and coconut oil in place of veg oil.  Once the cake baked and was crumbled, I added shredded coconut to it with the frosting. This is the inside of the cake pop. For the chocolate coating I used Wilton candy melts, and added a little coconut oil to thin it out (I find the candy melts always need a little something to make it thin enough to coat the cake pop without making it too heavy). Then I stuck on some Kakamora faces with frosting. These were a special order from Etsy (from here)- edible ink printed on wafer-like sheets of frosting!

The girls had a lot of fun creating the Moana boats with me. We made a huge batch of blue Jello. While it set in the fridge, the girls made the sails by cutting out triangles and drawing on the spiral and lacing the paper onto toothpicks. We used chocolate wafer cookies for the boats.

That cake!!! I used this recipe for the cake and I’ll never use another recipe again for a cake like this. It was sturdy enough for the layering and fondant yet remained moist and delicious!  The grass skirt was green fondant and the top layer was covered in a cake-crumb coat which looked like sand (the cake crumbs I used were the browned outside bits of the cake which I had removed).

Another favorite creation was the use of pineapples as center pieces. After coring the fruit (which was used in the fruit platter) I simply put a small mason or jam jar inside filled with water. Just as the party began I placed a variety of colorful flowers in each. The fruit vases last several days and are lovely so let my friends take them home after the party wrapped! This is something I’m sure to do again and again as pineapples are quite easy and inexpensive here in Miami.

The character cut-outs are something I highly recommend everyone try doing – as they can be very expensive to buy. I downloaded images from the internet and sent them to print at my local Kinkos for about $1 each. I simply cut them out and glued them to foam core board which I picked up at the dollar store. Out of leftover pieces of foam core I built the support for the cutout to stand up and just hot-glued everything in place. I did these about a week before the party – super cheap and super easy!

The paper flowers are gorgeous hand-made creations a friend of mine had made for a baby shower. I was lucky enough that she let me borrow them for my party and they worked out great with the theme.

This slideshow requires JavaScript.

“Mommy, I want the green soup for dinner!”


IMG_4647
Split-pea soup: it’s what’s for dinner!

Just because its nearly 100 degrees in Miami, it doesn’t mean my littlest one doesn’t feel like eating her favorite soup! (So I learned this weekend!)  This is pretty much the tastiest, easiest and healthiest soup you can make.  Both of my girls absolutely love it. So, when they actually ask for Split Pea Soup instead of pizza or pasta, I do all I can to get it ready as quickly as I can!

When they were babies, and just beginning to eat solids, I would puree the soup before serving so that they would have no problems with the bits of ham.  I firmly believe that giving them interesting, complex “grown-up” foods at a young age has helped expand their palate and interest in foods and, come dinner time, I am very grateful!

This soup is hearty and one bowl will fill you up! You could always split the recipe in half, but I like to make a large batch since I know we’ll eat it one night, have leftovers maybe the next night, and the rest will be stored in tupperwares for the freezer! One small side note: I make a baked ham 2-3 times a year and I always freeze my left overs.  I use the freezer-safe zip-close baggies and portion out amounts that will work for batches of soup like this one.

Split Pea Soup

1/2 small onion (or 2 leeks, white/light green part, rinsed well), chopped

3-4 carrots, diced (a handful of baby carrots will work just fine also!)

2 ribs of celery, diced

3/4-1 cup smoked/cooked ham (I prefer using leftovers from a baked ham, use the bone too, but store-bought is fine too)

2 (14-16oz) bags dried split peas

4 quarts chicken stock (2 big boxes of the low fat/no sodium/no msg store-bought stuff works, but homemade is better!)

3 sprigs fresh thyme (or about 1tbsp of dried)

1 bay leaf

Salt & Pepper, to taste

Yummy Lentil Soup!

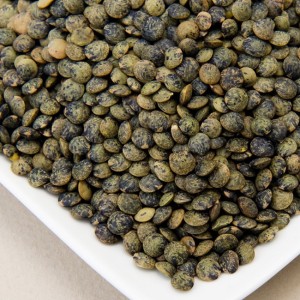
french lentils

Lentil soup: So nutritious, so yummy, so why not make some for dinner tonight? I grew up eating this on a regular basis and I’ll admit there was a time when I couldn’t stand it! I went through a “picky-eater” phase which was tough since lentil soup was in regular rotation in my mom’s kitchen.  But then I grew up! And I realized that I really love to eat and I that I really love lentil soup! I’ve been making this soup for years now. My girls have been eating this pretty much since they could eat solid food! (pureed at first, of course!) And, believe it or not, they love it! I made it tonight and they both ate huge bowls without so much as a whine.

This recipe makes a huge batch so you’re either cooking it for a crowd or for freezing (which is what I always do!).  You’ll thank me later when you have no idea what to make for dinner, didn’t have time to run to the store and/or have no desire to cook…just pop a container out of the freezer and Presto! Dinner is served!


Sopa de Lentejas

1/2 onion, diced

3-4 garlic cloves, diced

Pumpkin Banana Bread

20131207-143629.jpg

Yes PUMPKIN! Yes BANANAS! This bread is awesomely amazing and I can’t stop making it. I currently have 3 loaves in my freezer! I found myself last month with about 35 bananas from our tree in the back yard. It was the end of October and I had pumpkin on the brain too! So I found a recipe for Pumpkin Banana Bread with Vanilla Bean Glaze which is really yummy, but I had to make it my own…in other words I had to get some chocolate in there! So here’s my version and I know you will love it!

Ingredients
3 very ripe bananas, peeled and mashed
1 c sugar
1 (15-ounce) can pumpkin puree
2 cups self-rising flour
2 eggs, room temp
1 teaspoon vanilla
½ tsp ground cinnamon
1/4 tsp pumpkin pie spice
pinch of salt
1 c semi-sweet chocolate chips
Using mixer, blend bananas and sugar. Add pumpkin until well-blended. Slowly add flour (or else you’ll get a dust storm!) Then add eggs, vanilla, cinnamon, pumpkin pie spice and salt until smooth. Stir in the chocolate chips by hand. I’m sure some chopped walnuts would be lovely as well. I like to make this in 2 loaf pans (one to keep and one to give away!) or sometimes in 4 mini loaf pans, the disposable kind, so that I can make these as gifts. You just need to grease and flour the pans lightly and divide the batter evenly between them. Bake at 350 for approx 40-45 minutes. Testing with a toothpick helps determine when it’s done.

20131207-143549.jpg

Best Lasagna Ever!

Yummy and satisfying like a big warm hug, this is probably the best and quickest lasagna I’ve ever made.

Ingredients
3-4 Garlic cloves
1/2 Onion, chopped
2 Carrots, 1 Rib of Celery, 1/2 Green Bell Pepper all chopped
1 lb ground beef
dried basil, oregano, thyme, red pepper flakes, salt, pepper
Jar marinara sauce
Box of ready to bake lasagna pasta
3 tbsp Butter
1/4 c flour
2 c warm milk (may not use it all but it’s best to have enough ready to go)
nutmeg, optional
olive oil
4 c shredded mozzarella cheese
1/4 c parmesan cheese

20131207-133841.jpg

Meat Sauce: Using a large skillet sautee onion and garlic in some olive oil until translucent, but not brown. Add in remaining chopped veggies. You can always use just what’s on hand including zucchini, mushrooms, etc. Cook for about 3-4 minutes. Push the veggies to the outer edge of pan and throw the ground beef in the middle. Using the wooden spoon break up the meat so it can all get cooked and start to brown up. Add in your spices now too so they can cook with the beef. Add enough of your favorite marinara sauce so that you are left with a thick meat sauce (not too runny). Throw in some red pepper flakes for a little kick. At this point I like to puree my meat sauce with an immersion blender stick (do be extremely careful when using this tool or a  blender, you need to let the sauce cool down as it may spatter and you could get burned!). I do this because my little ones don’t like the sauce chunky and, to be honest, I am now quite fond of the smooth texture. If you want to make your own sauce I would add a large can of peeled whole tomatoes (I love San Marzano) along with a large can of the same tomatoes but “crushed” variety. This gives you a nice thick sauce and would have to cook for at least 30-45 min and I would probably have added more garlic and herbs at the beginning.

Béchamel (White) Sauce: In a large skillet melt the butter with 1-2 TBSP olive oil. When it starts to bubble add the flour and whisk. The trick is to make sure you have enough liquid in the pan so that the flour doesn’t just become a thick ball of dough so be sure to add the flour 1 spoon at a time. Let the flour cook about a minute and then begin adding the warm milk about 1/4 c at a time. Keep whisking and keep the temp high enough so that it is constantly bubbling, and you will see a nice creamy sauce come together. Add salt, pepper and if you like some nutmeg. This sauce thickens as it sits so feel free to make it a little runny.

20131207-133856.jpg

Building the Lasagna: Spread a few spoonfuls of the meat sauce in the bottom of a 9×13 pan. Cover with your ready to bake lasagna sheets leaving space in between them. Trust me they expand and you will not be left with gaps. Now spread a good layer of meat sauce and top that with a bit of the béchamel. This sauce is thicker and won’t spread as easily, thats ok. As it heats it will spread. Next is a light layer of mozzarella and a sprinkle of parmesan. You will probably get 2 more layers like this one. On top finish with the last of the meat sauce and cheeses. Cover this with foil and bake at 350 for about 40 minutes. Remove the foil and cook about 15 more minutes until the top is bubbly (I usually put the broiler on to get the cheese to brown up)

20131207-133912.jpg

Let’s get cooking!

OK I’m not a chef but I do love to cook! I grew up watching and eventually helping my mom in the kitchen.  Its where she spent most of her time, still does now that I think about it.  And so it’s inevitable that I too spend much of my time cooking! I have fun doing it and, to be honest, I feel proud when I can serve my family a fresh, healthy meal.  My girls are still pretty young but when I’m in the kitchen cooking they almost always want to watch and help me! Hmmm…I wonder where they get it from?! LOL

I’m going to share recipes on this blog and it’s primarily because I have a terrible memory and have recipes scribbled down on bits and pieces of paper that can be found in almost every drawer in my house!  I need someplace to centralize my notes and this is as good a place as any.  Most of my recipes come from my mom and most of them have the classic “about a cup of” and “a pinch of” as measurements.  That used to freak me out when I started cooking on my own, but over the years I’ve seen it turn into an opportunity to experiment with a recipe and make it my own.  So, dear reader, should you decide to try one of my recipes don’t be afraid to change something to your liking and if you have a question just leave a comment!

Mac-n-cheese from scratch

Here’s an awesome recipe (found here: http://sayyestohoboken.com/2013/04/10-minute-homemmade-mac-and-cheese.html) with a slight twist of my own.  Despite the fact that it resulted in a massive amount of mac-n-cheese no one complained about eating it at every meal for a few days because, like I said, it was mac-n-cheese!

Next time I might try putting it into a casserole dish, topping with panko bread crumbs and broiling.

3 T of butter
3 T of flour
1 can of evaporated milk (2% milk)
1 box of pasta shells
1 cup of milk (low-fat)
2 cups of sharp cheddar cheese (2% milk and only sharp!)

1 cup green beans or asparagus chopped into bite sized pieces

Pinch of: Salt, garlic powder, pepper, nutmeg and dash of tabasco or two!